
Technical Tip
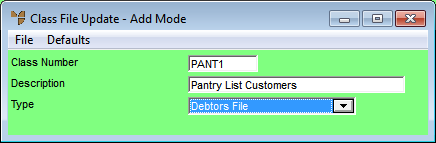
Before you begin the following procedure, if you only want to create auto contracts for customers belonging to a specific customer class, you must have created that customer class in the Class master file (refer to "File - Class").
In Micronet, contracts can be created automatically based on a customer’s previous buying history. In the food wholesaling industry, this is often referred to as a "pantry list" – a list of the most likely or common items that a customer purchases. It is also known as an order template.
Auto contracts can be created for all customers or for specific customers belonging to the same customer class.
Auto contracts can be created in two ways:
For each customer, Micronet compiles auto contracts by:
The new contract is named as ZZ1234, where ZZ is a prefix for auto contracts and 1234 is a unique Micronet link number that was created for this customer when their account was first entered into Micronet. This is an internal system ID.
|
|
|
Technical Tip Before you begin the following procedure, if you only want to create auto contracts for customers belonging to a specific customer class, you must have created that customer class in the Class master file (refer to "File - Class").
|
Creating Auto Contracts via the Debtors Contract Pricing Master File
To create auto contracts for customers using the Debtors Contract Pricing master file:
Refer to "Adding a New Debtor Contract" or "Updating a Debtor Contract".
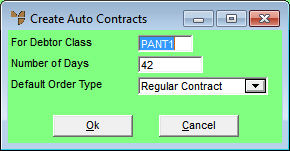
Micronet displays the Create Auto Contracts screen.
|
|
Field |
Value |
|---|---|---|
|
|
For Debtor Class | Enter or select the debtor class code for the customers you want auto contracts created for. If you leave this field blank, contracts are created for all customers. |
|
|
Number of Days | Enter the number of days from today over which Micronet needs to collect sales history. For example, to collect sales history for all the items sold to customers in the last six weeks, you would enter 42 (6 x 7 days). |
|
|
Default Order Type |
Select the type of contract you are creating. Options are:
|
Micronet creates the auto contracts then redisplays the Debtors Contract File Update screen.
Creating Auto Contracts by Command Line
Micronet also allows a command line option to fully automate the creation of auto contracts. This should be used by experienced Micronet users only.
The command has the following format:
MDSW32 AutoContractDays=dddd, AutoContractClass=ccccccc
where dddd is the number of days and ccccccc is the customer class. If a class is not specified, then the auto contract is applied to all customers.